|
« Getting Started
EZ-FileManager Basics 1. IntroductionThe purpose of this basic course is to teach you how to transfer a file (a photo or a graphic) from your personal computer to your EZ-NetTools® member account. There are two tools that can accomplish this transfer (commonly called uploading), EZ-FileManager and EZ-Browse. EZ-FileManager is a more complete and feature rich tool, while EZ-Browse is usually used to find a file for a link. Both of these tools can do much more, but we will only deal with the uploading of files in this short course. In this course we will only describe EZ-FILEMANAGER. If you want to upload photos into an EZ-PhotoAlbum directory, it would be better to use the upload features in the EZ-PhotoAlbum tools. Click here if this is what you want to do. Note: Other web companies will use a program called File Transfer Protocol or FTP to upload files. This is a very common and useful program. EZ-FileManager accomplishes basically the same function. EZ-NetTools® does not use FTP because a server that allows FTP to transfer files is inherently insecure and could be easily compromised by a hacker. Starting EZ-FileManagerThere are two ways to start EZ-FileManager. It does not make any difference which one you use. Just use the one that is easiest for you. First, there is a link on the construction menu for starting EZ-FileManager. 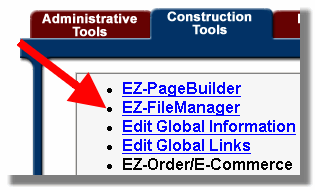
Link from construction tools Second, when you are working within EZ-PageBuilder, in the drop down list is an option to start EZ-FileManager. When you start File Manager from within Page Builder, a new window opens to display the File Manager page. This is different than the first method described above. Just prior to opening the File Manager page, the Construction Tools menu page will briefly display. 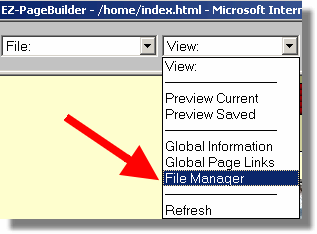
Starting from within EZ-PageBuilder When you click on the EZ-FileManager link you will be taken to the EZ-FileManager page, similar to the one shown below. What you will see depends on the folders and directories that are in your account. 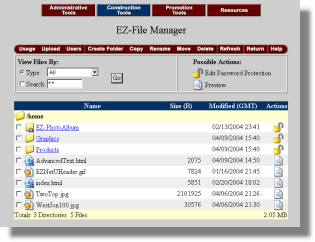
2. Uploading FilesFor this course we will only explain those features required to upload files. To upload one or more files click on the “Upload” button.
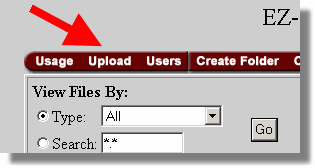
The file upload window will open up.
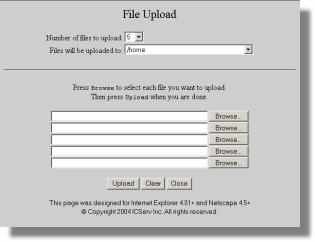
There are two sections to the Upload page. In the upper section you can specify the number of files you want to upload at a time. In the drop down list you can specify up to 20 files at a time. If you specify a number different from the default number of 5, the page will refresh itself to display the number of entry boxes for the number you specify. Note, you do not have to fill in all of the boxes. You can upload fewer files than the number of boxes. (Note: the sum of all the files sizes to be uploaded cannot be more than 4 megabytes at a time.)
You must specify where you want the files to be uploaded to. Using the drop down list, specify the folder you want to receive the files being uploaded. (Note: while you can upload photos into an EZ-PhotoAlbum directory within EZ-FileManager, it is better to use the upload feature in that tool.) 
Specify destination of the upload
In the bottom half of the “File Upload” page are the boxes were you specify the file you want to upload. 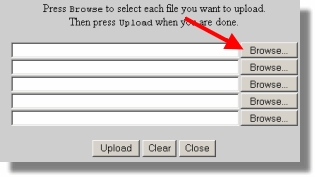
The easiest way to do this is to click on the “Browse” button next to the entry box. This will open up a window that will display the folders and files on your computer. Click on the file you want to upload and then on the open button. This will copy the file name into the appropriate box on the File Upload page. For the next file, click the next “Browse” button and repeat the process. Repeat the process for each file you want to upload.
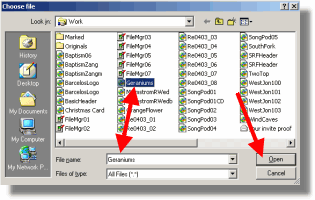
Once you have selected all the files you want to upload click the “Upload” button. 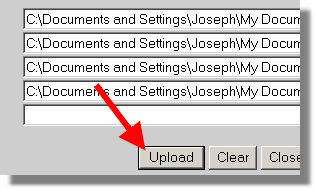 Open file to upload Open file to upload
After files have been uploaded you will see upload report. This report will tell you how many files were uploaded successfully, how big they were, how long it took and what the transfer rate was. If you had any duplicate files, you will receive a message indicating the files that have duplicate names. If this is the case, you may either replace the files or chose not to upload them. 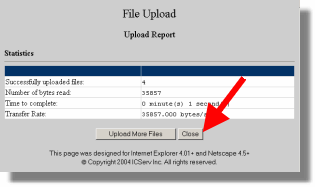 Upload Statistics Upload Statistics
You have the option of uploading more files or closing. If you click “Close” you will return to the EZ-FileManager page. If you want to upload more files, then click “Upload More Files” and repeat the process.
Once you have uploaded the files, you will return to the EZ-FileManager page. The names of new files you uploaded should be displayed. (If the files do not appear, you may have uploaded to another folder.)  Sample file manager page Sample file manager page
To exit from EZ-FileManager, simply click the “Return” button and you will return to where you started.
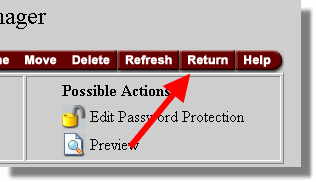 Exiting EZ-FileManager Exiting EZ-FileManager
Once you have uploaded files several times, you will find this a very easy process. This is a good skill to develop because all graphics and photos will need to be uploaded to your EZ-Nettools® account.
|